Use NEST Destkop with NRP
This is a guide to show how to use NEST Desktop with NRP (Neuro-Robotic Platform).
The NRP enables users to perform virtual experiments on virtual objects (e.g. robots, robotic arms) or on virtual animals (e.g. rats).
In our case we use NRP to learn neuronal activity dynamics of the “robot brain” according to a thought experiment by the cyberneticist Valentino Braitenberg.
His thought experiment demonstrated a simple concept of the brain interacting with the environment with a simple machine. The simplest concept of this so-called Braitenberg vehicle <https://en.wikipedia.org/wiki/Braitenberg_vehicle> shows direct connections from two sensors to two individual wheels. This implies, that the signal strength controls the rotation speed of the wheel.
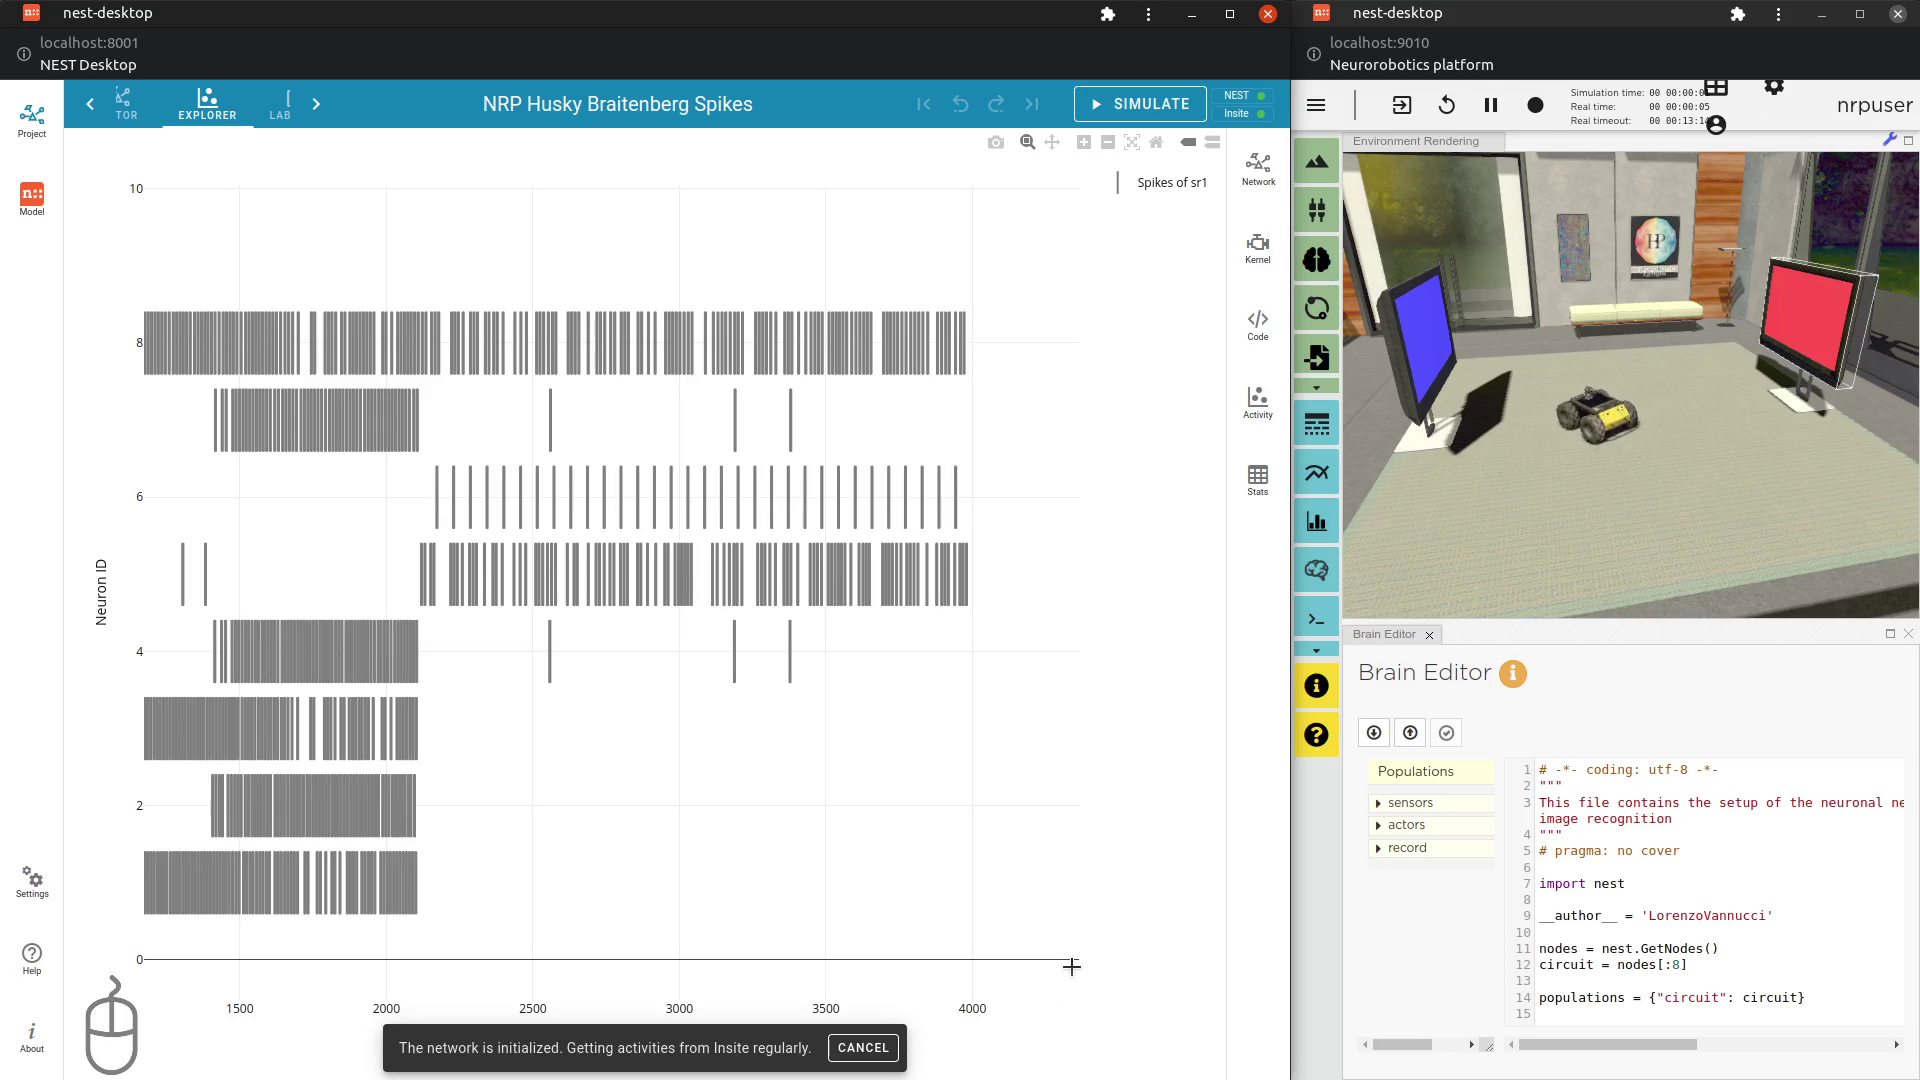
In our experiment, our robot (“Husky”) acts similar to the Braitenberg vehicle. Additionally to the basic setup in “Husky”, we implanted a “robot brain” receiving electrical signals from the sensors, processing them and transferring signals to motors/engines. In summary, the robot brain controls the movement and thus our robot “Husky” is able to react to the environment. In the NRP experiment, we see our robot “Husky” and two monitors showing a screen color, e.g. blue, red, green. The user can change the screen color. During the live experiment, the Husky rotates itself during a non-attractive situation (blue and green screen). However, when one of these monitors shows an attracting color (red) and the camera sees it, the Husky moves towards to it.
In NEST Desktop we can observe the spike activities of the “Husky brain”.
How to perform a simulation with NRP and NEST Desktop
See also
First, open two browser windows/tabs, one for NEST Desktop and another for the NRP page. You can place two windows side-by-side to see both at the same time.
In NEST Desktop import the project “Husky experiment” (from GitHub). Investigate the network and prepare the simulation.
In the NRP you have to clone and launch the Husky experiment. Then, you can start the experiment in the virtual environment. Here, you can see that the robot with the “Husky” network (the “Husky”) is rotating. Now, switch the screen color of a monitor to red. Watch until the “Husky” moves toward the red screen.
Observe the spike activity in NEST Desktop (recorded by Insite).
See also
For this approach, we need to run the simulation with Insite as recording backend.
When you want to learn how to use NEST Desktop with Insite, please read Simulate with Insite.
Acknowledgements
Thanks for the collaboration of NRP and NEST Desktop:
Viktor Vorobev (Collaboration on NRP and NEST Desktop)
Marcel Krüger (Insite as recording backend)
Fabrice Morin (Contact person of NRP)
Jochen M. Eppler (NEST Server MPI)
Benedict Feldotto (Implementation of NEST Server in NRP)